Instruction Manual
Read the section on Manual mode and how to adjust the shutter speed, and lens aperture independently. Also read changing the ISO from the lowest number (best image quality) to the highest number (lowest image quality).
Shutter Release
Pressing the shutter-release button halfway down will focus the lens, activate the exposure meter and display the information in the viewfinder and monitor. This allows you to see what adjustments are necessary to zero out the Exposure Indicator with the shutter speed and aperture dials while in M (Manual) mode.
Mode Dial
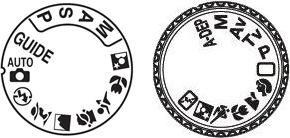
M (Manual)
Use this mode to control the shutter speed and aperture independently.
Read the manual to learn how to adjust the shutter speed and lens aperture independently.
Changing the Aperture & Shutter Speeds Independently
1. Set the Mode dial to M (Manual)
2. Push the shutter-release button halfway down to activate the Exposure Indicator
Exposure Indicator/Light Meter
Manually Change the Shutter Speed
3. Turn the wheel on the top or back of the camera body to change shutter speeds
Manually Change the Aperture
4. Push the Exposure Compensation button down while turning the wheel in step 3 to change the aperture
5. The objective is to set the Exposure Indicator to zero by adjusting the shutter speed and aperture independently.
Note: Cameras with two wheels: one wheel changes shutter speed and the other wheel changes aperture.
Photo Assignment
Shoot One Photograph in Manual Mode
Manual Mode
1. Set the Mode dial on the camera to M (Manual)
2. Zoom the lens to any focal length and focus on the subject
3. Push the shutter-release button halfway down to activate the Exposure Indicator
4. Adjust the shutter speed and/or aperture until the Exposure Indicator is set to zero
5. Shoot the scene
Check Image
Make certain the image is properly exposed. If the image is too dark or too light, the exposure indicator was not set to 0.
Resize Image
The image from this assignment needs to be resized before uploading. Use your favorite image editing software to change the width or height (whichever is longest) to 1200px, otherwise, locate Resize Image in the Extras dropdown menu above or click this link for detailed instructions for resizing images.
Finding Image Details
1. Right mouse click the image and select Properties then Details.
2. Scroll down to Camera and collect the data for F-stop, Exposure time, and ISO speed.
3. Include the image data when uploading a photo, e.g., ƒ/22 1/125 ISO-800.
Uploading Images
Once you're satisfied with the results, upload the image to the Post section of the Manual Mode, & Exposure Indicator lesson. Click Add Photo, select Browse... or Choose File, locate your file and include Image Details to the Add image data & info here text field, then click Upload Photo.
Image Editing Software
Image Editing Online
ipiccy.com, pixlr.com, lunapic.com, and sumopaint.com
Image Editing Downloads
GIMP for Windows and Seashore for Mac
Image Editing Apps
Pixlr App, Instagram, Camera+2, VSCO Cam, and Snapseed
